Wednesday, 4 January 2023

In Wagtail GeoLocation Widget how to set a Default location ( and set zoom )

 To set the default map location in the wagtailgeowidget package, you can define the GEO_WIDGET_DEFAULT_LOCATION setting in your Django settings file.

Here is an example of how to do this:

GEO_WIDGET_DEFAULT_LOCATION = {"lat": 50.5230, "lng": -4.6558}

This will set the default map location to the coordinates 50.5230° N, 4.6558° W (Bodmin, Cornwall, United Kingdom).

The GEO_WIDGET_DEFAULT_LOCATION setting should be a dictionary with keys 'lat' and 'lng' representing the latitude and longitude, respectively. The values should be float values.

You can also set the default map location dynamically based on the value of a field in your model by defining a callable as the value of the GEO_WIDGET_DEFAULT_LOCATION setting.

Here's an example of how to do this:

from django.conf import settings def get_default_location(): # Code to retrieve default location from model goes here return {"lat": 50.5230, "lng": -4.6558} GEO_WIDGET_DEFAULT_LOCATION = get_default_location

This will set the default map location to the value returned by the get_default_location function.

Tuesday, 31 May 2022

Django - Grabbing a JSON object from QueryDict

 
What I'm doing here is passing some JSON through the 'rest.framework' .  The problem is that when using 'request.json'  I'm seeing the following being returned. 

<QueryDict: {'': ['{"time":{"0":"06:00","1":"07:00","2":"08:00","3":"09:00","4":"10...


What I need to do is extract the JSON out .  To do this , the following works. 

list(data.values())[0]


Wednesday, 25 May 2022

M1 Chip issue with AWS Lambda SAM Layers


Just a quick note , if you've searched and found this blog then I expect you already know deep down that the M1 chip is your issue.  There is a solution though.  Let me explain. 


So, what we've been doing is using Lambda Layers to install Python packages on our Lambda installation.  However, when putting the same code on my Mac ( M1 Chip ) it doesn't work ! 

https://docs.aws.amazon.com/lambda/latest/dg/configuration-layers.html

It does work if we take the zip file from the AMD64 chipped Mac , and put that on my Mac and proceed. 

That is the solution we're having to use at the moment , the zip needs to be compiled on the AMD64 chip , doing it on the M1 chip won't work. 


Tuesday, 17 May 2022

Could not 'pipenv install email' - 'python setup.py egg_info did not run successfully.' error.

Here's the error code I was getting. 

Installing email... Error: An error occurred while installing email! Error text: Collecting email Using cached email-4.0.2.tar.gz (1.2 MB) Preparing metadata (setup.py): started Preparing metadata (setup.py): finished with status 'error' error: subprocess-exited-with-error × python setup.py egg_info did not run successfully. │ exit code: 1 ╰─> [1 lines of output] ERROR: Can not execute `setup.py` since setuptools is not available in the build environment. [end of output] note: This error originates from a subprocess, and is likely not a problem with pip. error: metadata-generation-failed × Encountered error while generating package metadata. ╰─> See above for output. note: This is an issue with the package mentioned above, not pip. hint: See above for details. This is likely caused by a bug in email. Report this to its maintainers. ✘ Installation Failed


The recommended solution across the web seemed to be to run the following. 

pipenv install --upgrade setuptools


However, this didn't work for me.  I needed to use the '--pre' tag. 

pipenv install --pre email


This now works, the version I had the issue with was 'email-4.0.2'


So, if you have a 'email-4.0.2 won't pipenv install' issue then I hope this post helps. 


Thursday, 7 April 2022

Wordpress installation on Docker - How to access the Database

 After running through this blog on how to create a Wordpress site on Docker.  ( Which works excellently ) https://davidyeiser.com/tutorials/docker-wordpress-theme-setup


After doing so, I couldn't quite work out what details I needed to use in Sequel Pro / Sequel Ace. 


There's a line that I needed to add to the Wordpress DB setup though, and that was to add the ports .

ports:
- "3366:3306"


So my entire file looks like this. 

version: '3'

services:
db:
image: mysql:5.7
volumes:
- db_data:/var/lib/mysql
ports:
- "3366:3306"
restart: always
environment:
MYSQL_ROOT_PASSWORD: somewordpress
MYSQL_DATABASE: wordpress
MYSQL_USER: wordpress
MYSQL_PASSWORD: wordpress

wordpress:
depends_on:
- db
image: wordpress:5.1.1-php7.3-apache
ports:
- "8000:80"
restart: always
environment:
WORDPRESS_DB_HOST: db:3306
WORDPRESS_DB_USER: wordpress
WORDPRESS_DB_PASSWORD: wordpress
working_dir: /var/www/html
volumes:
- ./wp-content:/var/www/html/wp-content
- ./uploads.ini:/usr/local/etc/php/conf.d/uploads.ini
volumes:
db_data:


And then I can use


Tuesday, 29 March 2022

Vue.js not building correctly in 'dist' folder 'npm run build'

 'npm run build' 'dist' folder not working.


I'd been hitting a bit of a brick wall with this task, so thought it'd be a good idea to commit it to the blog. Incase someone else finds it an can save themselves a heap of time. The task I was trying to achieve was

'How to host a Vue.js project on Firebase'  .  

And I was following this blog and youtube video for guidance. 

How to deploy vue.js applications with firebase hosting

And Net Ninja's 

Firebase Hosting Tutorial #4 - Deploying a Vue Site

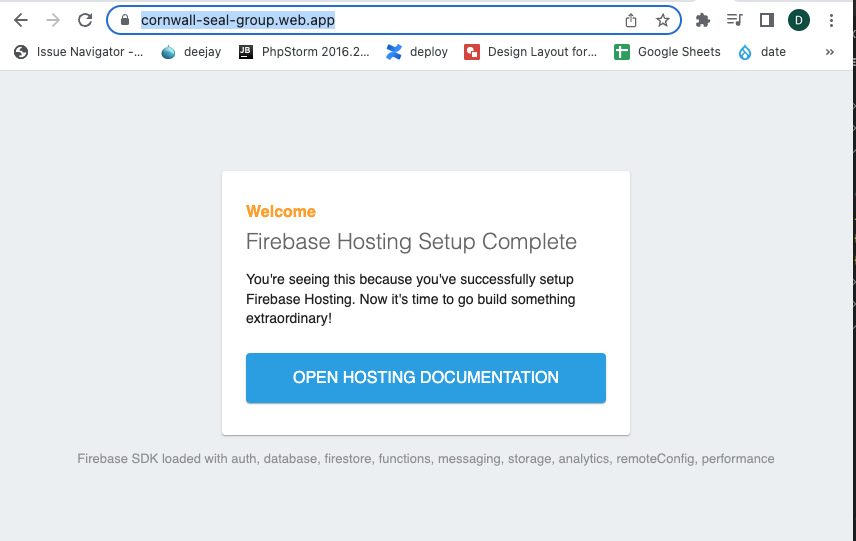
But on a site ( that was already built and working locally ) I could only see the Firebase hosting holding message . 

'Firebase Hosting Setup Complete' 


I could however could create a new Vue.js website ( boiler plate ) and work from that, but building up from scratch again would be excruciating. 


Let's take a look at process I was following and where it was getting stuck. 

$. firebase init

Scroll down to the first 'Hosting config' choice and click on 'spacebar' and then 'return'. 


There is already a public folder in use, so we'll want to set the public directory as 'dist' 

As we're using Vue.js which is a javascript app that rewrites all the pages through the index page, then we need to select 'y' in response to , r
ewrite all urls to /index.html . This creates a dummy index page.


We don’t want to deploy this , we now want to build our vue application so that all the files go inside this ‘dist’ folder and then we want to deploy it.


1 npm run build


And we should now be able to view our site with.

1firebase serve


And this gives us the same ‘Firebase Hosting’ message we’re seeing before :confused:


On my basic vue.js install though, I could see that it was working fine. One thing that caught my eye was that the 'dist' folder was still empty. Hold on ! No, the issue was another 'dist' folder had been created and I had one in the 'root' of the project and one in the 'app' folder.

  1. I removed both the ‘dist’ folders and started again.

  2. Ran ‘fiebase init’ and chose the hosting as before.

  3. The ‘dist’ folder was created in Root . But I manually moved it to the ‘app’ folder

  4. I then ran ‘npm run build’ . this created the new files.

  5. In ‘firebase.json’ I had to add the following code

    1 "hosting": { 2 "public": "app/dist",


  6. Ran ‘firebase serve’.


    So I have the site showing using ‘firebase serve’ . :slight_smile:


  1. firebase deploy --only hosting

And I can now see it on the app online :) I hope this saves someone a heap of time, as it took me a while to work this one out :/




CodeRed CMS - How to Order ( weight ) the Navigation snippets

 The task was simple, I'd added a load of menu items to the top menu using snippets but I wanted to change the order 

What no drag and drop !  And neither could I see an input box to enter a position.   Surely I wouldn't have to get my hands dirty and write some code for this. 

Here's an easy fix though.  

As the navigation uses flexbox .  All you need to do is call the Bootstrap Order class.

And then in your 'navigation' item 'snippet' just add the ordering like this